Check-in ThemeThe ability to brand the Fellowship One Check-in application by activity or super check-in. Several default themes are available and you may create your own.s are available to dress up Check-in. Several themes are available to choose from and you can easily create your own themes.
Note: To see and apply Check-in themes, you will need the Check-in Theme Manager security access right.
From the Theme Manager, you can apply any available theme to an activity or to a Super Check-in.
Note: You can only apply themes to activities to which you have security rights (i.e., you will need Ministry Write access to the ministry in which the activity exists).
To assign a theme
Note: If Check-in is already running, you will need to re-enter the Activity Code or Super Check-in Code to see your theme changes.
Now comes the fun part! You can create your own custom Check-in themes. This section explains how to do it.
When creating your graphics to use for your custom theme, keep the following in mind:
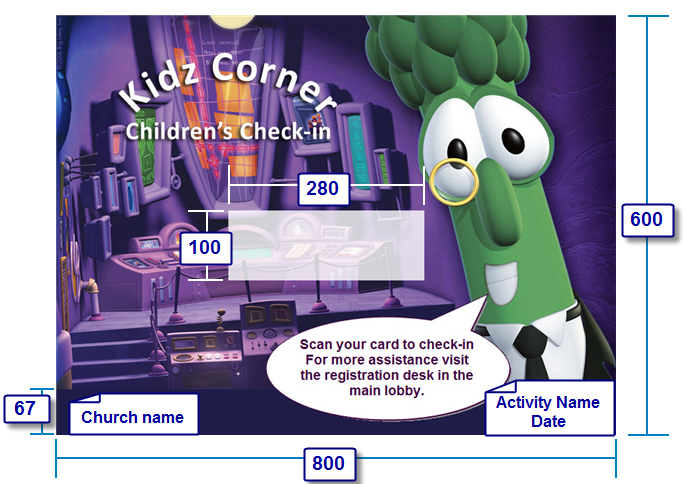
When planning your theme design layout, there are a few measurements that need to be considered. Check-in displays all messaging, buttons, activity information, and date/time in the exact same place.
As shown below, standard messaging displays in the center of the screen. You will need to account for text that displays in the footer area (67 pixels high and the font is typically white in nearly ever Color Scheme available).
For the background image, you should plan on allowing for most of the screen to be a solid color. As the buttons and search results display on this screen, it’s better if it’s not busy.
When you are ready to test your theme, you will need to upload your images into Fellowship One. As a reminder, themes can only be created and modified by Fellowship One users with the Check-in Theme Manager security access right.
To create a new theme:
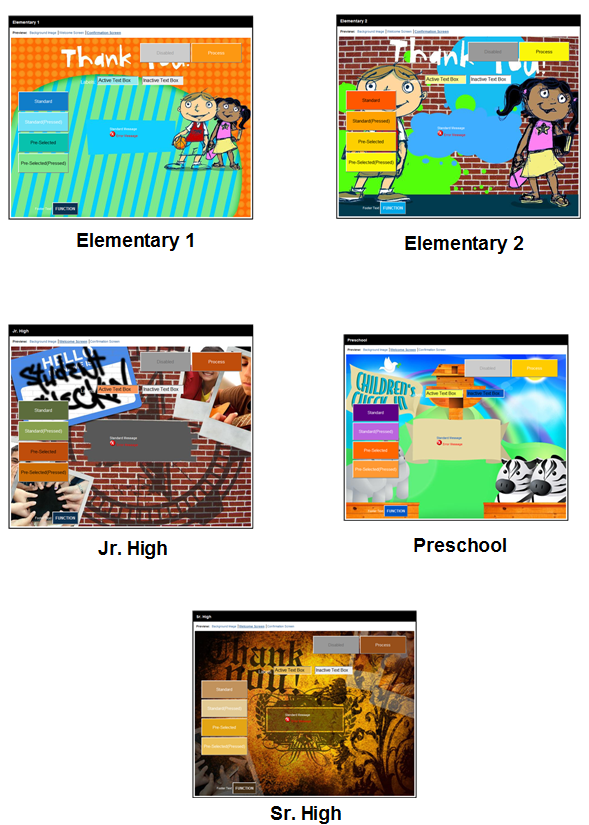
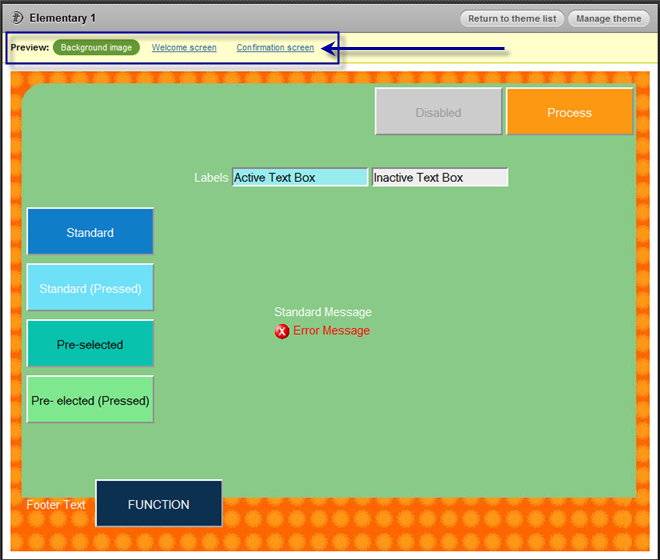
When your theme has been created it will appear in the Theme List (click Ministry > Check-in > Theme Manager). Click the Preview option beside your theme to see all three images.